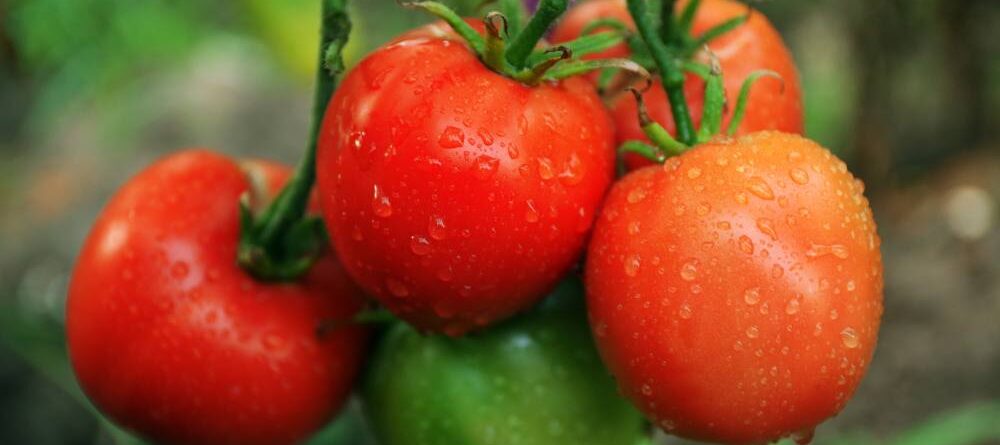
Tomato Grafting
Tomatoes are the vegetable most grown in home gardens. Sometimes, though, they can be hard to grow and produce good tomatoes. Grafted tomatoes might be the answer to home tomato growing problems.
When I first heard of grafted tomatoes, I thought it was a marketing ploy. Why graft something that lives for such a short amount of time? Further research has shown that grafted tomatoes can out produce ungrafted tomatoes in field conditions. Great, but what will it do for the home gardener?
What Is Grafting?
Grafting is the joining of two plants together. You may be familiar with grafted fruit trees, in which a tasty variety is grafted onto a hardy but less tasty rootstock. The scion is the top and the rootstock is the bottom.
Why Graft Tomatoes?
Grafted tomatoes started as a way for farmers to reduce plant loss due to soil-borne diseases. If all you grow is tomatoes, you can’t rotate your fields. Soil borne diseases build up and can cause a lot of loss. Growing disease resistant varieties helps, but often the disease resistant varieties are not the tomatoes that taste the best. Grafting the most in demand tomatoes to hardy rootstock is the answer.
For home gardeners, grafting allows you to grow heirloom varieties with superior taste but low disease resistance. You can purchase grafted tomatoes at big box stores and online, but they can be pricey. If you are a tomato aficionado, you can graft your own tomatoes much less expensively. Of course, the initial learning curve is a bit steep, but it isn’t impossible to get really good at grafting.
The two tomato root stalk varieties used most in our area are Multifort and Estamino. A recent trial in Overton by Dr. Joe Masabni, the Texas Agrilife Extension vegetable expert, found that Tycoon tomatoes produced 13 pounds of tomatoes in one season. However, those Tycoon tomatoes grafted onto Multifort root stock produced 18 pounds. The ones on Estamino produced 20 pounds of fruit.
Steps To Graft Tomatoes
There are three phases to grafting tomatoes. From sowing to transplanting takes about five weeks, so plan ahead accordingly. Here is a look at all three phases and what to do in each one.
Growing Seedlings
First, you grow the seedlings for the rootstock and the tomatoes you want to eat. Multifort tomatoes are resistant to all three types of fusarium wilt, corky root rot, fusarium crown and root rot, root-knot nematode, tomato mosaic virus, and verticillium wilt. Estamino tomatoes are resistant to fusarium crown & root rot, fusarium wilt (1-3), leaf mold, tobacco mosaic virus, verticillium wil, root knot nematodes, and tomato spotted wilt virus. Both varieties are widely available now.
For the scion, or the tomatoes you want to eat, choose a tomato with the taste and characteristics you want.
Sow more seeds than you want, as some will not be suitable for grafting and some grafts fail. The seedlings are ready to graft when a grafting clip fits snuggly on the stem of both the rootstock and the scion. This is normally two to three weeks after sowing the seeds.
Grafting the Tomatoes
The easiest way to graft your tomato plants is by the cleft method, which is explained below. There are other methods, though. You will need the following supplies to graft your tomatoes:
- Plants
- New razor blade or scalpel
- Alcohol
- Bleach
- Grafting clips
- Latex or non-latex gloves
- Newspaper
To do the graft, follow these steps.
- To minimize the transmission of diseases to the tomato seedlings during grafting, clean the surface you are working on and cover with newspaper or something similar.
- Wash your hands well before handling the tomato plants.
- Place supplies on the newspaper.
- Put on the gloves.
- Choose tomato plants to graft. They must have the same diameter.
- Decapitate the rootstock with the razor blade about 5 mm below the first set of leaves.
- Cut the roots off of the scion about 5 mm above the first set of leaves.
- Cut a groove in the middle of the rootstock that is 4 mm deep.
- Cut the bottom of the scion into a wedge shape.
- Insert the wedge end of the scion into the groove on the rootstock.
- Use a grafting clip to keep the graft together.
Post-Graft Healing
After you finish grafting your tomatoes, this is how to care for them.
- Place the grafted tomato in a styrofoam or cardboard box.
- Keep the humidity at 90-95 percent by putting a tray of water in the box and covering the box with plastic wrap.
- Cover the box with a blanket to exclude light.
- Water from the bottom to reduce the stress on the graft.
- Do not mist the plant as it can cause the graft to separate.
After one week, remove the cover from the box. Gradually increase the light until it is normal. Continue to water from the bottom of the pot.
After two weeks, the seedling can be hardened off, so it is ready to go outside.
The clip will fall off on its own as the graft heals and the plant grows. Don’t try to remove it as the plant tends to break when you do.
Transplanting Grafted Tomatoes Outdoors
When you plant your grafted tomato, make sure the graft is at least an inch above the ground. Do not bury the graft or place it too close to the soil. The scion can develop roots in that case and defeat the purpose of the graft. If you see roots developing above the graft, prune them off.
Do not place mulch over the graft. Wait until the graft grows higher than the recommended three inches of mulch before putting mulch out. Again, the scion can develop roots if the mulch is too close to the graft.
A main supply you will need is grafting clips. These are available from tomato specialty stores and other online seed supply places. The 2 mm size works best for tomato grafting.
Grafting tomatoes is not hard, just time consuming. It may be worth doing if you like to eat heirloom tomatoes that are vulnerable to soil borne illnesses.
Additional information
https://u.osu.edu/fruitpathology/files/2017/07/3607-Grafting-Tomatoes-final-proof-xwxvg6.pdf
https://extension.purdue.edu/extmedia/ho/ho-260-w.pdf
https://horticulture.ucdavis.edu/information/tomato-grafting-guide
https://www.uvm.edu/vtvegandberry/factsheets/graftingGHtomato.html
https://extension.psu.edu/to-graft-or-not-to-graft
https://durham.ces.ncsu.edu/2020/06/grafting-to-create-a-healthier-tomato/
https://extension.colostate.edu/topic-areas/yard-garden/grafting-tomatoes/


")