Summer Container Ideas
It is time to freshen up those porch and patio containers you planted in the spring! The good news is that you may be able to keep some of the plants and simply change out the flowers that are looking sluggish. However, if you have pansies and they still look perfect, take them out anyway because a few days of heat will wipe them out. The garden centers are absolutely bursting with summer color and your biggest decision may be how to limit yourself to just one cart. Prepare your list at home while looking at the containers you want to fill, so you go in with a plan. This way, you will come home with the plants you need and not a car-load of things that caught your eye but will not work well in your summer containers (if you are like me). Also, before you go, look around your garden and see if there are plants in your beds that can be dug up and placed in pots, particularly as fillers. For instance, just this morning I dug up some variegated liriope for one container. Another container I keep year-round has a small rounded boxwood that serves as a nice centerpiece surrounded by plants that vary seasonally.


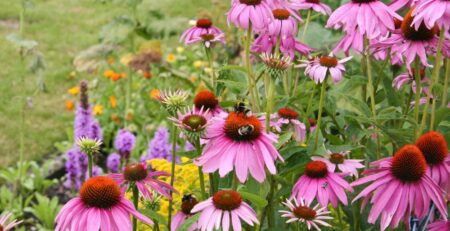
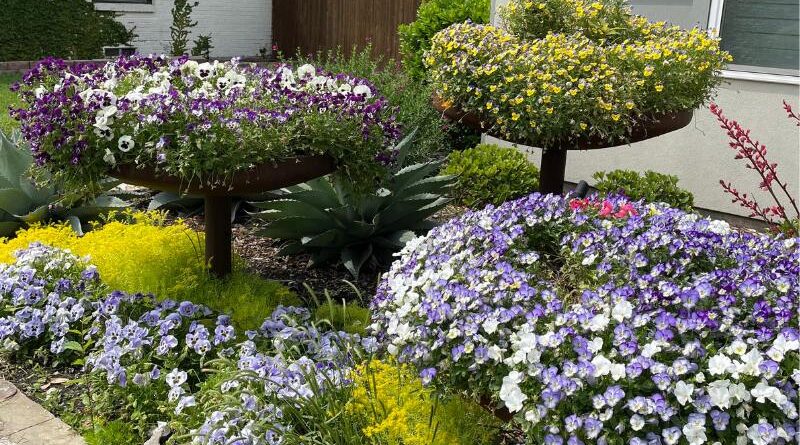
If you have plenty of sunshine in the area where your containers will be located, you are in luck. All those vibrant and colorful flowers on the market will give you a summer of beauty and enjoyment. The options are wide open, from reds and purples to oranges and yellows. If you are fond of a particular color and like lots of it in your containers, try a cluster of three pots filled specifically with that color. The concentration of color might be purple petunias or yellow calibrachoa, or maybe pink portulaca or moss rose. Having a color palette in mind before you shop is helpful, as is knowing what looks best with your favorite color. If you are choosing yellow flowers for a container, they look wonderful paired with purple, maybe plumbago. Red flowers are nice when toned down with bursts of white blooms. If bright colors are not your style, gorgeous containers can be made of an arrangement of white flowers as your thriller with green fillers and spillers. Asparagus fern looks wonderful among white flowers. As well-known author James T. Farmer often states, “Green and white is always right.” Calibrachoa comes in several colors, but the white is one of the prettiest.
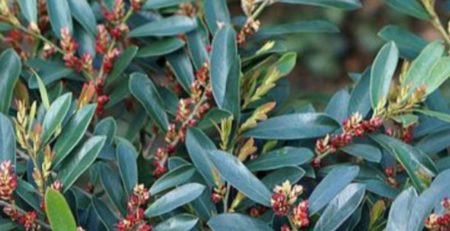
If you are placing your containers on a porch or shady patio there are plenty of colorful shade-loving choices that are not necessarily blooming flowers. Caladiums are a tried-and-true staple in our part of the country and they provide great swaths of pink, red, or white with green margins. There are several choices, including short and tall varieties of these big heart-shaped leaves which sway beautifully in the breeze. The bulbs can be purchased at the garden center if you do not mind waiting for them to mature to maximum beauty. However, many caladiums are available a foot tall and ready for containers. Some ideas include arranging them around a centerpiece foxtail or Kimberly fern. Or maybe you have a beautiful urn that you can fill with white caladiums with bright green creeping jenny spilling over the sides. One of my pots contains white caladiums and dusty miller with silver falls dichondra trailing over the edge. The dozens of varieties of coleus are ideal as easy color staples for shade areas. They come in vibrant reds and burgundies, as well as every shade of green. I planted a Strawberry Drop coleus one year that began as a four-inch plant and then branched two feet in every direction as it matured. Likewise, Heucheras, commonly called coral bells, make wonderful fillers, and come in beautiful deep burgundy, bright chartreuse, and dozens of colors in between.
To prepare your containers, begin with good soil. I prefer my homemade soil. There is even a soil-less mixture that allows for superb drainage. https://aggie-hort.tamu.edu/archives/parsons/misc/container.html#:~:text=You%20can%20mix%20a%20soilless,25%20percent%20washed%20builder’s%20sand. If you buy ready-made potting soil, my advice is not to skimp on the price, and lift the bags while choosing to make sure the soil is not too heavy. If you want to make your own soil, measure the following in your trusty wagon or wheelbarrow: 4 gallons of finely shredded pine bark mulch or azalea mix, 4 gallons cotton burr compost, 2 gallons of perlite, 1 gallon peat moss or coir (moistened and softened), and ½ gallon of expanded shale. Measurements do not have to be exact. If you are working with pots containing some plants that you want to keep, lift them out and stir the soil to soften and freshen it. Check each plant’s roots to make sure they get adequate water. While doing this, I like to rake fertilizer through the soil, preferably something natural like Espoma Plant Tone or Flower Tone.
When planting, remember to pay attention to the plants’ water needs. Keep low-water plants like succulents in different containers from plants that need more frequent watering. The same concept applies to each plant’s sun and shade needs. Now to the fun part! While they are still in the containers, begin placing the plants on top of the soil, standing back often to see how the arrangement looks. For some reason, often what seemed like too many plants for one pot instead leaves blank spaces and empty spots. If you are okay with that in the beginning, the plants will fill in after a week or two with proper care, but it is also fine to plant every square inch.
When you have your arrangement the way you like it, remove the plants from their nursery pots, ruffle the bottom and side roots, and place the plant in the container soil. Now, take some time and effort to situate the plant just right and integrate it into the soil. Just plopping down the little square and shoving a bit of soil around it does not work! Speaking from experience, you will often find a plant looking pitiful and dry after a month because the roots were unable to leave the square shape of the original container and could not reach water. When the arrangement is complete, water lightly and every few days use a moisture meter to determine if additional water is needed. Typically, water twice each week. The fertilizer you used in your planting soil will take you through the first three weeks or month, but then, particularly with flowering plants, you will probably need to fertilize at least every other week.
Good luck with your summer containers and enjoy the process.