Spring Containers for the Porch or Patio
Nothing says spring like bright colorful flowers overflowing from containers and hanging baskets. We are all eager to get back into the garden to welcome the warming temperatures. Although the average last frost date for the Dallas area is March 12 ( https://www.weather.gov/fwd/d32dates ) the possibility of a late freeze is still a threat to tender spring gardens. Joyous spring containers are the perfect solution. Containers can be covered or moved inside if we get a surprising and rather unwelcome late March freeze. The following are some easy steps to help you get out into the garden and started on your spring containers.
First select the containers you want to use. For plants that might have to be moved in case of a freeze, lightweight fiberglass containers work well. For the front porch, if you are placing more than one container, coordinate the color and size, and remember that odd numbers are always best. Perhaps you have three favorite pots that are complimentary to one another and similar in color. That’s perfect! It might be less important to have similar pots on the back patio, so choose the ones you want to use and find the right location for them. Make sure all containers have good drainage holes, and where necessary, place a saucer beneath the pot to protect the porch or patio. If you do have saucers beneath the containers, it is critical that you not allow water to stand in them because mosquitoes will find that tiny bit of water the perfect spot for laying eggs.
Now that you have selected the pots you want to use and their probable locations, you can fill each half to two-thirds full of potting soil, or add it to the list for the garden center shopping. Use a nice lightweight, loose soil. I make my own potting soil in a wheelbarrow with two parts finely ground pine bark mulch, two parts cotton burr compost, two parts peat moss, 1 part perlite, and a couple handfuls of expanded shale. There are numerous DIY recipes for potting soil online, and all are lightweight and provide good drainage.
We are now getting to the fun part. Keeping in mind the pots you have placed on the porch or patio, go to your favorite garden center, and gather your plants. While shopping, consider the look you want and the amount of maintenance you are willing to perform. A container with a small boxwood ball will require no maintenance except water, while a container full of petunias or bulbs will need to be watered frequently and snipped and deadheaded to keep them looking fresh. For each pot, select plants that have similar sun and water requirements. Perhaps you like the tried-and-true thriller, filler, spiller process. Based on that method, you begin by selecting sun or shade plants that will serve well in your pot locations. Your thriller will be the tallest plant, the filler will be midsize multiples of mounding plants, colorful annuals for example, like Texas Superstar Tidal Wave Cherry Petunia (https://texassuperstar.com/plants/petunia_tidalwave_cherry/tidalwavepetunias.html). The spiller can be anything that will gracefully exceed the edge of the pot. Texture is very important, and combining plants of different colors and leaf shapes adds to that texture. Tucking in a red leaf heuchera alongside the beautiful silver leaves of lamb’s ear can add dimension to the grouping. Fragrance is always nice, and for knee-high containers a spiller of rosemary that releases its scent when brushed against is an added treat.


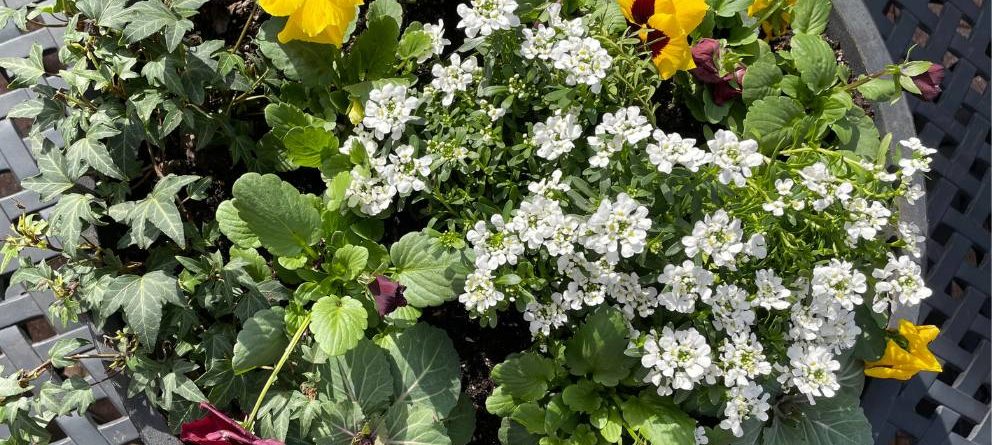
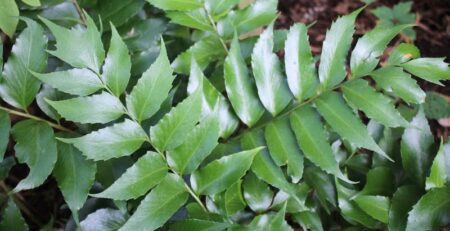
If you have a sunny area for your container, an arrangement of succulents can be nice. Another option is planting several pollinator plants together to draw butterflies and hummingbirds to the area. For a cheerful and attractive look on a porch or wide front steps, you can place three identical pots, or use hanging baskets filled with matching colorful flowers. Let the selection of spring plants at your favorite garden center help guide your selections. For sunny locations there are several choices available, including kalanchoe, Gerbera daisies, and cineraria. For shade containers there are cyclamen, Rieger begonia, asparagus fern, and both green and white oxalis. One of the photos shows my front porch container using a topiary boxwood with pink and white cyclamen, white stock, variegated ivy, Dusty Miller and asparagus fern. Whether you find vast or limited options, you’re certain to find lovely choices.
Back at home with your purchases, it is time to get busy. Do not immediately plant the new plants, but instead place the nursery pots inside your planned containers, shifting and moving things around until you have a suitable arrangement. You might even add plants from your existing garden to your fresh new container. Many times, during this process I grab a shovel and head to my garden beds where I can dig up a clump of aspidistra or liriope to add to my arrangement, both of which make nice thrillers. Plants should be planted no deeper than they were in their nursery container. When you have arranged the plants to your liking, ruffle an organic fertilizer or bone meal into the top of the soil, and then plant them! If you bought 2-inch pots or 4-inch pots, often it helps to place 3 or 4 of one plant together to give them more emphasis. When you have everything arranged and planted in their new pot, water well. These plants do not have the advantage of nutrients found in the ground, so you must be prepared to provide those nutrients by fertilizing regularly with a natural fertilizer.
Enjoy your new container gardens! Remember to check them often to see if they need water, and always remove any dead or dying leaves. If it is apparent a plant is not thriving, stop by the store for a new replacement right away. Let your container garden experience be as enjoyable as the lovely spring weather!

