Five Easy Steps to an Elegant Summer Garden
Because plants are much like humans during the extreme heat, the garden can look droopy and drab from early July through mid-September here in North Texas. I have visitors throughout the summer who want to tour my garden, so I try to keep it company-ready all the time. It is not difficult for me because I am retired and gardening is my favorite hobby; but if you find yourself overwhelmed when you look out the windows at your back yard, there are some simple ways to get things ship-shape. Spending a half hour a couple of times a week can make a huge difference in the overall appearance of your garden.
STEP ONE - Water

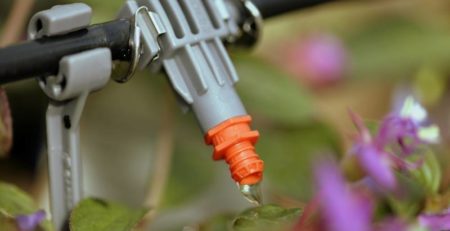
Of course, first and foremost is watering properly. Some container plants need to be watered daily during extreme heat, and using a bubbler or shower nozzle can make a big difference in getting the soil properly hydrated. Water until the water is pouring from the bottom of the container to remove the salts from the plant. If you have hanging baskets or smaller containers that are drying out too rapidly, consider putting the plants in larger containers. Remember to fertilize. Container plants, particularly blooming plants, need fertilizer more frequently than plants in the ground, but use sparingly because too much fertilizer can cause the plants to grow too fast and too large, which requires even more water.
Of course, first and foremost is watering properly. Some container plants need to be watered daily during extreme heat, and using a bubbler or shower nozzle can make a big difference in getting the soil properly hydrated. Water until the water is pouring from the bottom of the container to remove the salts from the plant. If you have hanging baskets or smaller containers that are drying out too rapidly, consider putting the plants in larger containers. Remember to fertilize. Container plants, particularly blooming plants, need fertilizer more frequently than plants in the ground, but use sparingly because too much fertilizer can cause the plants to grow too fast and too large, which requires even more water.
STEP TWO – Do a daily walkthrough
Early each morning I grab two buckets, one empty for weeds and garden debris, and a tool bucket that has a great canvas pocket attachment which is wrapped around the bucket and left there on a permanent basis. This tool caddy contains a dozen slots of various sizes which can be filled with the most important and often-used tools. In mine I have three sizes of pruners, a Hori Hori, a trowel, mosquito spray, a moisture meter, and a small level. The level is used to check my three water basin fountains and some of the plant stands that occasionally begin to lean. If you do not have a five-gallon plastic bucket, get one or two. They are about $5.00 at the big box stores and there are dozens of uses for them. I keep four of them at the ready, and I use two or more daily.
STEP THREE - Prune and dead-head
As you walk through the garden, remove dead leaves and errant

branches. You may be surprised by how much better things look after simply removing dead leaves and picking up yard clutter. Get after those mushy gray blobs under your lamb’s ear plants, and prune the older flat-on-the-ground leaves of hellebores. The same can be done to heucheras, ferns, and many other perennials. Removing older leaves from the underside will liven up the appearance of all garden plants. If you have front porch containers keep an eye on them. Sometimes one little plant in the container grouping will die and should be immediately removed. The container will look better with a blank spot than with a dead plant. You may be able to take something from another place in your yard to fill the empty space, or drop by the nursery and pick up a replacement plant.


For blooming plants and annuals, a little dead-heading will help them look fresher. Many salvias, garden phlox, black-eyed Susans, bee balm and other flowering plants can be cut back by half after their first bloom is finished. This not only makes the plants look better, it encourages new growth, and often they will rebloom in as little as three weeks. The cone-shaped unattractive blooms on coleus and basil plants can be pruned back to encourage fuller and healthier plants. One of my container plants is a rather large polka dot plant. The plant bloomed like crazy this spring but the blooms were not especially pretty, and the plant became leggy and messy. I cut it back by a third and it now looks like a new plant.
Most shrubs will be fine through the summer if you pruned them in the spring. I have several limbed-up Burford hollies, and they need occasional removal of shoots coming out of the trunks, as well as a little tidying of the overall shape. This takes less than one minute per shrub. For my boxwoods, some round and some in a short hedge appearance,
I use an electric pruner a couple of times a year, although the outcome is much prettier if I prune them by hand. Elaeagnus is famous for tall stems shooting a foot over the rest of the shrub. It is best to reach down into the shrub and prune from beneath the height you want to maintain, thus avoiding visible knots where three or four new stems develop at the new cut. The same is true for taller Loropetalum plants.
STEP FOUR - Weed
Each time you walk through the garden pull a few small weeds, and then every other week or once a month go through and do a more thorough weeding. Of course, the easiest weeding is after a rain, so jump on that opportunity if you can.
STEP FIVE - Mulch
Another thing that can dramatically improve the appearance of an area that is not looking its best is a light layer of mulch. When I volunteered at the Dallas

Arboretum, I saw that workers take a wagon of crushed pecan shells to disperse as needed around the garden and I was told they do that each day. Even though I spread mulch in the perennial beds each spring, a little fresh mulch tossed onto bare spots or faded areas can make a big difference. One of those previously mentioned five-gallon buckets filled with mulch is useful for topping off some of the most visible areas of the garden.
And there you have it. Just a few simple steps that will help you feel happy with your garden. Go forth and enjoy the summer.